วันเสาร์ที่ 28 พฤษภาคม พ.ศ. 2559

Can't Eject External Hardisk : How To Eject External Hardrive Windows 10


Can't Eject External Hardisk


STEP 1

-ขั้นตอนแรกให้ตรวจสอบสถานะของ External Hardisk 
-โดยให้เข้าไปที่ Properties เลือกแท็บ Hardware แล้วดับเบิลคลิกที่ชื่อของแฟลชไดรฟ์ ในหน้าต่างย่อยอันใหม่ที่แสดงขึ้นมาให้คลิก Change Settings -> Continue 
-จากนั้นเลือกไปที่แท็บ Policies จะมีรายการให้ปรับแต่งให้เลือกเป็น Better performance แล้วกด OK ให้ทำการรีสตาร์ทใหม่ ก็จะสามารถ Safely Remove Hardware ได้แล้วครับ 
-หลังจากนั้นให้ทำการรีสตาร์ทเครื่องใหม่อีกครั้ง แล้วทำตามขั้นตอนเดิมแล้วเลือกกลับมาเป็น Quick removal(default) ตามเดิมแล้วกด OK รีสตาร์ทเครื่องอีกครั้งอาการไม่สามารถ Safely Remove Hardware ก็จะหายเป็นปกติครับ


-First, check the status of External Hardisk.
-To access the Properties, select the Hardware tab and then click the name of your flash drive . In the small window that appears, click Change Settings -> Continue.
-Then select the Policies tab to customize the list to choose from. Better performance and press OK to restart the new Safely Remove Hardware can have it.
-Then restart again. Then follow the same steps , then back to Quick removal (default) as the original , then press OK again to restart the Safely Remove Hardware symptoms can not be healed me.

Step 1 If not , use step 2 instead.
(ถ้า Step 1 ไม่ผ่าน ให้ใช้ step 2 แทน)

STEP 2

1. Go to the Registry Editor (press Windows + R on the keyboard)
2. Type regedit, and click OK


3. Sign the folder HKEY_LOCAL_MACHINE \ SYSTEM \ CurrentControlSet \ Services \ usbhub


4. Select the Edit menu, and then select New - Key


5. Name the "hd" then press enter. The results are as shown below: (if existing key named hubg, skip steps 4 and 5)


6. Select the Edit menu again, select New, then select DWORD (32-bit) Value


7. Name the DisableOnSoftRemove, then press enter


8. Right click on DisableOnSoftRemove, and select Modify
9. In the value content with the number 1, and then click Ok
10. Close the Registry Editor
11. Restart your computer to see results
12. Try to do the eject / safely remove the external hard disk, and see the results


top.sk Web Developer

I can design web applications by using Java Server Faces (JSF), Primefaces, EJB3, SQL, DB2 (IBM) and designing report (Word, Excel and PDF) by using XML Script and Crystal Clear Report for the organization that can be easily and no problem for used and they can use the Web to manage the customer's organization effectively. I want to learn a new culture, technology and colleagues involved in the IT profession.

วันอาทิตย์ที่ 22 พฤษภาคม พ.ศ. 2559

Android Development with Android Studio


Android Coding by Vogella Company


1.STARTER TUTORIALS
-Introduction to Android development with Android Studio - Tutorial
http://www.vogella.com/tutorials/Android/article.html

-Solutions for common Android development problems with the Eclipse IDE- Tutorial
http://www.vogella.com/tutorials/AndroidDevelopmentProblems/article.html

2.FUNDAMENTAL TUTORIALS
-Android application and activity life cycle - Tutorial
http://www.vogella.com/tutorials/AndroidLifeCycle/article.html

-Android Intents - Tutorial
http://www.vogella.com/tutorials/AndroidIntent/article.html

-Android Logging - Tutorial
http://www.vogella.com/tutorials/AndroidLogging/article.html

-Showing dialogs in Android with fragments - Tutorial
http://www.vogella.com/tutorials/AndroidDialogs/article.html

-Using lists and grids in Android with RecylerView - Tutorial
http://www.vogella.com/tutorials/AndroidRecyclerView/article.html

-Using lists in Android (ListView) - Tutorial
http://www.vogella.com/tutorials/AndroidListView/article.html

3.USING FRAGMENTS AND THE ACTIONBAR
-Multi-pane development in Android with Fragments - Tutorial
http://www.vogella.com/tutorials/AndroidFragments/article.html

-Using the Android action bar (ActionBar) - Tutorial
http://www.vogella.com/tutorials/AndroidActionBar/article.html

4.FILE AND NETWORK ACCESS AND ASYNCHRONOUS PROCESSING
-Android background processing with Handlers, AsyncTask and Loaders - Tutorial
http://www.vogella.com/tutorials/AndroidBackgroundProcessing/article.html

-Android Networking - Tutorial
http://www.vogella.com/tutorials/AndroidNetworking/article.html

-Android Persistence with preferences and files - Tutorial
http://www.vogella.com/tutorials/AndroidFileBasedPersistence/article.html

-Android SQLite database and content provider - Tutorial
http://www.vogella.com/tutorials/AndroidSQLite/article.html

-Android XML Processing with the XmlPullParser - Tutorial
http://www.vogella.com/tutorials/AndroidXML/article.html

-JSON in Android - Tutorial
http://www.vogella.com/tutorials/AndroidJSON/article.html

5.ANDROID ADVANCED USER INTERFACE DEVELOPMENT
-Android - Using drag and drop in your application - Tutorial
http://www.vogella.com/tutorials/AndroidDragAndDrop/article.html

-Android (Home screen) Widgets - Tutorial
http://www.vogella.com/tutorials/AndroidWidgets/article.html

-Android Drawables - Tutorial
http://www.vogella.com/tutorials/AndroidDrawables/article.html

-Android Live Wallpaper - Tutorial
http://www.vogella.com/tutorials/AndroidLiveWallpaper/article.html

-Android resource selectors - Tutorial
http://www.vogella.com/tutorials/AndroidResourceSelection/article.html

-Android styles and themes - Tutorial
http://www.vogella.com/tutorials/AndroidStylesThemes/article.html

-Creating custom and compound Views in Android - Tutorial
http://www.vogella.com/tutorials/AndroidCustomViews/article.html

-Using animations in Android application - Tutorial
http://www.vogella.com/tutorials/AndroidAnimation/article.html

6.SERVICES, BROADCASTRECEIVER AND NOTIFICATION MANAGER
-Android BroadcastReceiver - Tutorial
http://www.vogella.com/tutorials/AndroidBroadcastReceiver/article.html

-Android Data Backup - Tutorial
http://www.vogella.com/tutorials/AndroidDataBackup/article.html

-Android memory and performance optimization - Tutorial
http://www.vogella.com/tutorials/AndroidApplicationOptimization/article.html

-Android Notifications - Tutorial
http://www.vogella.com/tutorials/AndroidNotifications/article.html

-Android Services - Tutorial
http://www.vogella.com/tutorials/AndroidServices/article.html

-Scheduling of tasks in Android with the AlarmManager and the JobScheduler - Tutorial
http://www.vogella.com/tutorials/AndroidTaskScheduling/article.html

7.ANDROID TESTING AND TOOLS
-Android application (performance and more) analysis tools - Tutorial
http://www.vogella.com/tutorials/AndroidTools/article.html

-Android user interface testing with Espresso - Tutorial
http://www.vogella.com/tutorials/AndroidTestingEspresso/article.html

-Android user interface testing with Robotium - Tutorial
http://www.vogella.com/tutorials/Robotium/article.html

-Testing with AssertJ assertions - Tutorial
http://www.vogella.com/tutorials/AssertJ/article.html

-Unit Testing with JUnit - Tutorial
http://www.vogella.com/tutorials/JUnit/article.html

-Unit tests with Mockito - Tutorial
http://www.vogella.com/tutorials/Mockito/article.html

-Using Hamcrest for testing - Tutorial
http://www.vogella.com/tutorials/Hamcrest/article.html

8.ANDROID BUILDS
-Building Android applications with Gradle - Tutorial
http://www.vogella.com/tutorials/AndroidBuild/article.html

-Building Android Apps with Apache Maven - Tutorial
http://www.vogella.com/tutorials/AndroidBuildMaven/article.html

-Using the Android Debug Bridge (adb) - Tutorial
http://www.vogella.com/tutorials/AndroidCommandLine/article.html

9.LOCATION API AND GOOGLE MAPS
-Android Location API - Tutorial
http://www.vogella.com/tutorials/AndroidLocationAPI/article.html

-Google Maps Android API v2 - Tutorial
http://www.vogella.com/tutorials/AndroidGoogleMaps/article.html

10.SENSORS AND TOUCH
-Android Camera API - Tutorial
http://www.vogella.com/tutorials/AndroidCamera/article.html

-Android Gestures - Tutorial
http://www.vogella.com/tutorials/AndroidGestures/article.html

-Android Sensor - Tutorial
http://www.vogella.com/tutorials/AndroidSensor/article.html

-Handling single and multi touch on Android - Tutorial
http://www.vogella.com/tutorials/AndroidTouch/article.html

11.LIBRARY PROJECTS
-Creating libraries for Android applications - Tutorial
http://www.vogella.com/tutorials/AndroidLibraryProjects/article.html

-Useful Android Libraries - Tutorial
http://www.vogella.com/tutorials/AndroidUsefulLibraries/article.html

-Using the Otto Event Bus library on Android - Tutorial
http://www.vogella.com/tutorials/JavaLibrary-EventBusOtto/article.html

12.SPECIAL ANDROID PROGRAMMING TOPICS
-Android Calendar API - Tutorial
http://www.vogella.com/tutorials/AndroidCalendar/article.html

-Android Cloud to Device Messaging (C2DM) - Tutorial
http://www.vogella.com/tutorials/GoogleCloudMessaging/article.html

-Android Internals - Tutorial
http://www.vogella.com/tutorials/AndroidInternals/article.html

-Android Source Code - Notes
http://www.vogella.com/tutorials/AndroidSourceCode/article.html

-Handling Media with Android - Tutorial
http://www.vogella.com/tutorials/AndroidMedia/article.html

13.USING ECLIPSE FOR ANDROID DEVELOPMENT
-Debugging Android applications - Tutorial
http://www.vogella.com/tutorials/AndroidDebugging/article.html
top.sk Web Developer

I can design web applications by using Java Server Faces (JSF), Primefaces, EJB3, SQL, DB2 (IBM) and designing report (Word, Excel and PDF) by using XML Script and Crystal Clear Report for the organization that can be easily and no problem for used and they can use the Web to manage the customer's organization effectively. I want to learn a new culture, technology and colleagues involved in the IT profession.

Features of Java EE 7


กว่าจะมาเป็น Java EE 7 ใช้เวลามาแล้วกี่ปี ?


สิ่งที่ Java EE 7 มีอะไรบ้าง ?
ส่วนที่ 1 : ส่วนที่ทำงานร่วมกับ Web Service
-JAX-RS 2.0
-JSON-P 1.0
-Web Socket 1.0
-Servlet 3.1

ส่วนที่ 2 :  ส่วนที่ทำงานร่วมกับ Front-end
-JSF 2.2
-EL 3.0
-JSP
-JSTL
-Bean Validation 1.1

ส่วนที่ 3 :  ส่วนที่ทำงานร่วมกับ Back-end
-Interceptors 1.2
-CDI 1.1
-Concurrency 1.0
-JPA 2.1
-JTA 1.2
-EJB 3.2
-JMS 2.0
-Batch 1.0
-JCA 1.7
-JavaMail 1.5

Java EE Containers


Java EE APIs ใน Web Container


Java EE APIs ใน EJB Container


Java EE APIs ใน Application Client Container


รายละเอียดของส่วนการทำงานต่างๆ ติดตามได้ที่สไลด์ด้านล่าง โดย Antonio Goncalves จากงาน JavaOne


top.sk Web Developer

I can design web applications by using Java Server Faces (JSF), Primefaces, EJB3, SQL, DB2 (IBM) and designing report (Word, Excel and PDF) by using XML Script and Crystal Clear Report for the organization that can be easily and no problem for used and they can use the Web to manage the customer's organization effectively. I want to learn a new culture, technology and colleagues involved in the IT profession.

วันศุกร์ที่ 20 พฤษภาคม พ.ศ. 2559

How to Setup Genymotion Emulator Configuration (Unable to start Genymotion Virtual Device)


Unable to start Genymotion Virtual Device 
- Virtualbox Host Only Ethernet Adapter Failed to start


จากที่ท๊อปได้พบปัญหาการลง Genemotion เวอร์ชั่น 2.6.0 ซึ่งเป็นเวอร์ชั่นล่าสุด หลังจากที่ได้ดาวโหลด Emulator เวอร์ชั่นที่ต้องการลงมาแล้ว ไม่สามารถ Start Emulator ที่ Oracle VM VirtualBox ได้ เนื่องจากมีปัญหาเรื่อง IP ที่ใช้ ท๊อปจึงได้แชร์การ Solve Problems นี้ไว้ เผื่อใครที่เจออาการแบบนี้จะได้ลองแก้ไขดูครับ


จากการสังเกต พบว่า ทุกคนจะเจอปัญหาเรื่องนี้มาพอสมควร...  เช่น ใน StackOverflow หรือใน Youtube เอง ก็จะมีวิธีแก้ไขอยู่ แต่เป็น Case by Case ไป...


-ในเบื้องต้น ให้เราเปิด VirtualBox และตรวจสอบการสร้าง Emulator โดย GenyMotion
-คลิ๊กขวา แล้วเลือก Settings และไปที่ Tab Network เพื่อปรับ Properties ให้ไปเลือก VirtualBox NDIS6 Bridged Networking Driver


-หลังจาก Set Network เสร็จแล้ว ให้ Run VirtualBox ด้วย administrator


-ให้ไปที่ File -> Preferences -> Network -> Host Only Networks


-ให้ Add IPv4 AddressIPv4 Network Mask, Server Address, Server Mask, Lower Address Bound และ Upper Address Bound

Adapter Tab:
-IPv4 Address : 192.168.0.201
-IPv4 Network Mask : 255.255.255.0


DHCP Server Tab:
Server Address : 192.168.0.100
- Server Mask : 255.255.255.0
- Lower Address Bound : 192.168.0.101
- Upper Address Bound : 192.168.0.199


Restart Windows และลอง Start Oracle VirtualBox อีกครั้ง !!!


ก่อนทดสอบ Emulator ผ่าน Android Studio

**Note : การ Import Project จาก Eclipse มายัง Android Studio ให้เลือก Menu "Import Project (Eclipse, ADT, Gradle, etc.) และจะต้อง Copy โครงสร้างภายใน 
ไม่ใช่ Copy แค่ Folder มาไว้ที่ Folder ใหม่ เพื่อการ Migrate Project ให้สมบูรณ์


ทดสอบ Emulator ผ่าน Android Studio ได้เลย...


กดปุ่ม Run > OK


References : http://stackoverflow.com/questions/19106436/unable-to-start-genymotion-virtual-device-virtualbox-host-only-ethernet-adapte
top.sk Web Developer

I can design web applications by using Java Server Faces (JSF), Primefaces, EJB3, SQL, DB2 (IBM) and designing report (Word, Excel and PDF) by using XML Script and Crystal Clear Report for the organization that can be easily and no problem for used and they can use the Web to manage the customer's organization effectively. I want to learn a new culture, technology and colleagues involved in the IT profession.

วันพฤหัสบดีที่ 19 พฤษภาคม พ.ศ. 2559

Killing Websphere Application Server to Stop and Start Server Again !!


Step 1 : Command List to Show TCP Connection 
-netstat -a -n -o

Step 2 : Select processes ID's (PID) 
for example : TCP 0.0.0.0:135 | PID : 936


Step 3 : Kill the Process to Stop connection of Server
-taskkill /PID <process_Id>
-taskkill /F /PID <process_Id>

for example : taskkill /F /PID 936


top.sk Web Developer

I can design web applications by using Java Server Faces (JSF), Primefaces, EJB3, SQL, DB2 (IBM) and designing report (Word, Excel and PDF) by using XML Script and Crystal Clear Report for the organization that can be easily and no problem for used and they can use the Web to manage the customer's organization effectively. I want to learn a new culture, technology and colleagues involved in the IT profession.

วันเสาร์ที่ 14 พฤษภาคม พ.ศ. 2559

How to setup Websphere Application Server


ขั้นตอนที่ 1 ติดตั้งโปรแกรม IBM Installation Manager และ อัพเดทโปรแกรม IBM Installation Manager
-เปิดโปรแกรม IBM Installation Manager ไปที่ File > Preferences
-กด Add Repository
-เลือกไปยังไฟล์ repository.config ในโฟล์เดอร์ที่เก็บไฟล์สำหรับติดตั้ง WAS > กด OK > กด Install
-เลือก IBM WebSphere Application Server Network Deployment แล้วกด Next
-เลือก Accept แล้วกด Next
-เลือก Installation Directory ที่ต้องการ โดยให้สร้าง Drive D ขึ้นมาเพื่อไม่ให้ติด Permission แล้วทำการ Install


ขั้นตอนที่ 2 การสร้าง Profile ของ WebSphere
-เปิดโปรแกรม Profile Management Tool แล้วกด Create
-เลือก Advanced profile creation แล้วกด Next
-กำหนดค่า Profile name และเลือก Profile directory แล้วกด Next
-กำหนดค่า Node name, Server name และ Host name แล้วกด Next
-กำหนดค่า User name และ Password แล้วกด Next
-ไม่ต้องเลือก Run the application server process as a Windows service. แล้วกด Next
-กด Create


การลบ Profile ของ WebSphere


ขั้นตอนการ Update SDK เพื่อใช้งาน Profile
-เปิดโปรแกรม IBM Installation Manager และไปที่ File  เลือก > Preferences และกด Add Repository
-เลือกไปยังไฟล์ repository.config ในโฟล์เดอร์ที่เก็บไฟล์สำหรับอัพเดท WAS แล้วทำการ Install

การใช้คำสั่ง Command Prompt เพื่อตั้งค่า SDK ให้กับ Profile
-เข้าไปที่ Command Prompt แล้วพิมพ์ Path ไปที่ D:\IBM\Websphere\AppServer\profiles\AppSrv02\bin ภายในเครื่อง แล้วพิมพ์คำสั่ง  -managesdk.bat –listAvailable เพื่อดู Version SDK
-พิมพ์คำสั่ง -managesdk.bat -listEnabledProfile -profileName <profile_name>  (เพื่อ ดู Version SDK ของ Profile ที่ใช้อยู่ ณ ปัจจุบัน)
-ถ้าไม่มี SDK Version ที่ต้องการ ให้พิมพ์ -managesdk.bat -enableProfile -sdkName <sdk_version> -profileName <profile_name>
-ตรวจสอบ Version SDK อีกรอบด้วยการพิมพ์คำสั่ง managesdk.bat –listAvailable และพิมพ์คำสั่ง managesdk.bat -listEnabledProfile -profileName <profile_name>

คำสั่งการลบ Profile 
-เข้าไปที่ Command Prompt แล้วพิมพ์ Path ไปที่ D:\IBM\Websphere\AppServer\profiles\AppSrv02\bin แล้วพิมพ์ manageprofiles.bat  -listProfiles
-พิมพ์คำสั่ง manageprofiles.bat  -delete -profileName <profile_name>


ขั้นตอนที่ 3 เพิ่ม WebSphere Application Server v8.5 Server โดยเข้าไปที่ Eclipse แล้วทำการ New Server ขึ้นมา และก็เลือก JRE ที่ Websphere ใ้ชงาน แล้วทำการ Start Server ในโปรแกรม Eclipse
ขั้นตอนที่ 4 เพิ่ม Shared Libraries ที่ต้องการจะเพิ่มเพื่อให้ Project ไปอ่าน Libraries ที่สร้างไว้สำหรับการพัฒนา Web Application โดยเข้าไปที่ https://localhost:<port_number>/ibm/console/
ขั้นตอนที่ 5 สร้าง Datasource เพื่อใช้งานกับ Database ตามที่ต้องการ
ขั้นตอนที่ 6 ตั้งค่า WebSphere Variables เพื่อเลือกใช้งาน Schema ในหลายๆ Database แล้วก็เปลี่ยน Datasource ให้ชี้ไปที่ WebSphere Variables แทน
top.sk Web Developer

I can design web applications by using Java Server Faces (JSF), Primefaces, EJB3, SQL, DB2 (IBM) and designing report (Word, Excel and PDF) by using XML Script and Crystal Clear Report for the organization that can be easily and no problem for used and they can use the Web to manage the customer's organization effectively. I want to learn a new culture, technology and colleagues involved in the IT profession.

วันเสาร์ที่ 7 พฤษภาคม พ.ศ. 2559

Java API for JSON


Java API สำหรับการสร้างและประมวลผล JSON มีหน้าที่อะไรบ้าง ??
-มาตรฐาน Java API ใช้สำหรับ parse, generate, transform, query JSON
-รูปแบบของวัตถุและ Stream API คล้ายกับ DOM และ StAX
-การ Binding JSON เพื่อเตรียมพร้อม Java objects

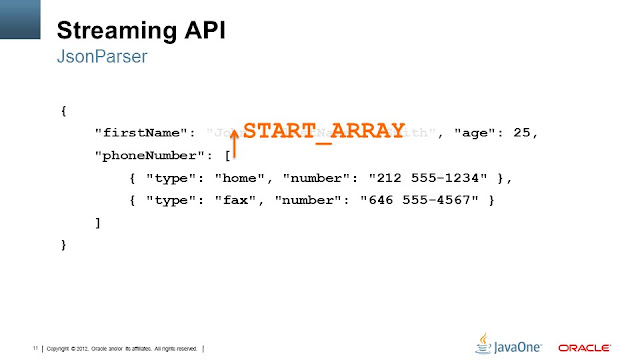
JsonParser คือ การแยก JSON Streaming ให้อยู่ห่างจาก input sources โดยใช้หลักการคล้ายกับ StAX XMLStreamReader

ขั้นตอนการใช้งาน ประกอบด้วย การประกาศ Json.createParser(…), Json.createParserFactory().createParser(…)

ส่วนประกอบที่สำคัญของ JSON มีอะไร เราไปดูกัน !!!

จากการอ้างอิงเอกสารงาน JavaOne สรุปโครงสร้างของ JSON ในภาษา Java ได้ดังนี้ครับ...

-START_ARRAY, START_OBJECT, KEY_NAME, VALUE_STRING, VALUE_NUMBER, VALUE_TRUE, VALUE_FALSE, VALUE_NULL, END_OBJECT, END_ARRAY


JSON Input

{
    "firstName": "John", "lastName": "Smith", "age": 25,
    "phoneNumber": [
        { "type": "home", "number": "212 555-1234" },
        { "type": "fax", "number": "646 555-4567" }
    ]
}

Java Code

Event event = parser.next();          // START_OBJECT
event = parser.next();                // KEY_NAME
event = parser.next();                // VALUE_STRING
String name = parser.getString();     // "John”

JsonGenerator : สร้าง JSON ไปยัง output sources คล้ายกับ StAX’s XMLStreamWriter
โดยใช้ Json.createGenerator(…), Json.createGeneratorFactory().createGenerator(…) จากการเลือกการกำหนดค่าที่มีคุณสมบัติ เช่น pretty printing

Java Code

JsonGenerator ge=Json.createGenerator(…);
ge.writeStartArray()
    .writeStartObject()
      .write("type", "home”)
      .write("number", "212 555-1234")
    .writeEnd()
    .writeStartObject()
      .write("type", "fax”)
      .write("number", "646 555-4567")
    .writeEnd()
  .writeEnd()
.close();

JSON Output


[
  {
    "type": "home”,
    "number": "212 555-1234"
  },
  {
    "type": "fax”,
    "number": "646 555-4567"
  }
]

JsonBuilder

-สร้าง JsonObject และ JsonArray
-กำหนด method chaining
-Type-safe (ไม่รวมทั้ง mix array และการสร้าง object methods)
-ยังสามารถใช้ JSONObject และ JsonArray ได้

JsonObject obj = Json.createObjectBuilder().build();
JsonArray value =
    Json.createArrayBuilder().add(Json.createObjectBuilder()
      .add("type", "home")
      .add("number", "212 555-1234")
  )
  .add(Json.createObjectBuilder()
      .add("type", "fax")
      .add("number", "646 555-4567")
  )
  .build();

JSON Output

[
  {
    "type": "home”,
    "number": "212 555-1234"
  },
  {
    "type": "fax”,
    "number": "646 555-4567"
  }
]

JsonReader

-อ่าน JSONObject และ JsonArray จาก input source คือ I/O Reader, InputStream (+ encoding)
-เลือกการกำหนดค่าที่มีคุณสมบัติ โดยใช้ JsonParser pluggable

try(JsonReader reader = Json.createReader(io)) {
    JsonObject obj = reader.readObject();
}

JsonWriter

-เขียน JSONObject และ JsonArray แล้วส่งออกไป ที่ I/O Writer, OutputStream (+ encoding)
-เลือกการกำหนดค่าที่มีคุณสมบัติ เช่น pretty printing
-ใช้ JsonParser pluggable

try(JsonWriter writer = Json.createWriter(io)) {
    writer.writeObject(obj);
}

หาข้อมูลเพิ่มเติม
-สามารถอ่าน draft spec และ API docs ที่ http://json-processing-spec.java.net

Resources
http://glassfish.java.net/
http://dlc.sun.com.edgesuite.net/glassfish/4.0/promoted/
-JSON-P
http://jsonp.java.net
-Slide Deck
http://www.slideshare.net/reza_rahman

Reference : เอกสาร Java API for JSON Processing โดย Reza Rahman (GlassFish/Java EE Evangelist) จาก Oracle ในงาน JavaOne
top.sk Web Developer

I can design web applications by using Java Server Faces (JSF), Primefaces, EJB3, SQL, DB2 (IBM) and designing report (Word, Excel and PDF) by using XML Script and Crystal Clear Report for the organization that can be easily and no problem for used and they can use the Web to manage the customer's organization effectively. I want to learn a new culture, technology and colleagues involved in the IT profession.

Bean Validation


Bean Validation


-มีการทำงานร่วมกับ CDI, JAX-RS, JPA, JSF และอื่นๆ ประกอบด้วย CDI, Method validation, มีการใช้งานร่วมกับ JAX-RS (REST Service) และการสร้าง Error messages โดยใช้ EL expressions

-CDI Alignment
ประกอบด้วย Delegate Bean Validation component lifecycle มีประโยชน์อย่างยิ่งในการปรับปรุง ConstraintValidator

public class ZipCodeValidator implements ConstraintValidator<ZipCode, String> {
    @Inject @France private ZipCodeChecker checker;
    public void initialize(ZipCode zipCode) {}
    public boolean isValid(String value, ConstraintValidationContext context) {
        if (value==null) return true;
        return checker.isZipCodeValid(zipCode); 
    }
}

-ตัวอย่าง Method Validation

@RequestScope public class Client {
    @Inject AccountService service;
    public void createClient() { service.createUser(...); }
}

@ApplicationScoped public class AccountService {       @NotNull public User createUser(             @NotEmpty String username,             String firstname, String lastname,             @Valid Address home,             @NotNull @Email String email,             @Past Date birthDate) {         // parameters are validated and an exception         // is raised upon failure         // business     } }

-การใช้งานร่วมกับ JAX-RS
โดยใช้ Bean Validation constraints ด้วย method validation

@Path(“/user”)
public class UserResource {
    @Post
    @Consumes("application/x-www-form-urlencoded")
    public void register(
        @NotEmpty @FormParam(“firstname”) String firstname,
        @NotEmpty @FormParam(“lastname”) String lastname,
        @NotNull @Email @FormParam(“email”) String email) { ... }

    // Works on fields and getters too }

การสร้าง Error messages โดยใช้ Expression Language
-การเพิ่มความสามารถในการใช้ EL เพื่อตรวจสอบข้อความผิดพลาด
-การเข้าถึงพารามิเตอร์ ข้อจำกัด และการสร้างความคุ้มค่า
-การเพิ่มข้อเสนอที่มีการแปล กรณีการจัดรูปแบบสตริงที่เกินไป

javax.validation.constraints.DecimalMax.message=\
    must be less than ${inclusive == true ? 'or equal to ' : ''}{value}

Resources
-Bean Validation project page
http://beanvalidation.org
-Glassfish 4
https://glassfish.java.net/

Reference : เอกสาร What’s New with Bean Validation in Java EE 7 โดย Reza Rahman (Java EE/GlassFish Evangelist) จาก Oracle ในงาน JavaOne

top.sk Web Developer

I can design web applications by using Java Server Faces (JSF), Primefaces, EJB3, SQL, DB2 (IBM) and designing report (Word, Excel and PDF) by using XML Script and Crystal Clear Report for the organization that can be easily and no problem for used and they can use the Web to manage the customer's organization effectively. I want to learn a new culture, technology and colleagues involved in the IT profession.

Expression Language in Java EE 7


Expression Language 3


Overview

-EL ครั้งแรกใน JSTL 1
-ย้ายไป JSP 2
-แบบครบวงจรกับ JSF 1.2 ใน JSP 2.1
-สเปคตอนนี้เป็นอิสระ
-ใช้ใน JSF, JSP, CDI, BV และอื่น ๆ

New Feature Summary

-Stand-alone API
-New operators
-Static field และ method references
-Custom type converters
-Lambda expressions
-Collection construction
-Collection/lambda operations

Support for stand-alone environments

-ให้มาตรฐาน ELResolver และ ELContext
-การประเมินผลการแสดงออกโดยตรง

ELProcessor elp = new ELProcessor();
Object message = elp.eval(“’Welcome ‘ += user.name”);

Defining functions and variables

ELProcessor elp = new ELProcessor();
elp.defineFunction(“func”, “ns”, “test.MyClass”, “funcname”);
elp.setVariable(“var”, “user.name”);

Defining beans

ELProcessor elp = new ELProcessor();
ELManager elm = elp.getELManager();
// Define a bean on the fly, into local bean repository
elm.definBean(“name”, new Name(“Peter”));
// Add a map to bean look-up
elm.addBeanNameResolver(new BeanNameResolver() {
  @Override
  public Object getBean(String name) {
     return myDB.get(name);
  }
});

String concatenation operator +=
ไม่สามารถใช้ + เพราะถูกใช้ไปแล้วสำหรับการดำเนินการทางคณิตศาสตร์

ELProcessor elp = new ELProcessor();
elp.eval(“’Welcome ‘ += user.name”);

Assignment operator =

สามารถกำหนดให้กับ Bean ที่มีอยู่ หรือสร้างแบบ Dynamic Bean ใหม่สำหรับค่า จากการจัดการโดย ELResolver.setValue

ELProcessor elp = new ELProcessor();
elp.eval(“xx = user.name);
elp.eval(“’Welcome ‘ += xx”);

Semicolon operator ;

เป็นประโยชน์สำหรับการแสดงผลข้างเคียงในการแสดงออกที่มีความซับซ้อน
ELProcessor elp = new ELProcessor();
elp.eval(“xx = user.name; ‘Welcome ‘ += xx”);

Custom type converters
-อนุญาตให้สร้างปลั๊กอินในรูปแบบที่กำหนดการแปลงเอง

elp.getELManager().addELResolver(new TypeConverter() {
  @Override
  public Object convertToType(ELContext context, Object obj, Class<?> type) {
    if (obj instanceof String && type == MyBean.class) {
      context.setPropertyResolved(true);
      return new MyBean((String) obj);
    }
    return null;
  }
});
       
Object val = elp.getValue("'John Doe'", MyBean.class);

Static field and method references

-รวมถึงค่าคงที่ enum
-Class จะต้องนำเข้ามาก่อนที่สมาชิกคงที่สามารถอ้างอิงได้

ELProcessor elp = new ELProcessor();
ELManager elm = elp.getELManager();
Elm.importClass(“com.acme.MyClass”);
elp.eval(“MyClass.staticName”);

Static field and method references
-java.lang package is pre-imported

ELProcessor elp = new ELProcessor();
elp.eval("Boolean.TRUE");
elp.eval("Integer.numberOfTrailingZeros(16)");

Lambda expressions

-syntax เหมือน Java SE 8
-มีพฤติกรรม anonymous function
-โครงสร้างประกอบด้วย EL expression
-การเข้าถึงไปยังสภาพแวดล้อมของ EL

x -> x+1
(x,y) -> x+y
() -> 64

Lambda expression: immediate evaluation

(x -> x+1)(10)-> 11
((x,y)->x+y)(3,4)-> 7
(()->64)()-> 64

Lambda expression: indirect evaluation

-lambda สามารถตั้งชื่อและประเมินผลทางอ้อม
-recursive invocation

incr = x -> x+1; incr(10)-> 11
fact = n->n==0? 1: n*fact(n-1); fact(5)-> 120

Lambda expression: as javax.el.LambdaExpression

-lambda จะห่อหุ้มด้วย javax.el.LambdaExpression

LambdaExpression lamb = (LambdaExpression)elp.eval(“x->x+1”);
lamb.invoke(10);
elp.eval(“[1,2,3].stream().map(x->x+1).toList()”);

Collection constructions

Sets, lists และ maps ในโครงสร้างได้

Set: {1,2,3}
List: [“eenie”, “meenie”, “miney”, “mo”]
Map: {‘one’:1, ‘two’:2}
Composite: {‘joe’: [‘m’,25], ‘amy’: [‘f’,18]}

Collection operations: overview

-มีอิทธิพลจาก JDK 8
-Implemented ด้วย lambda และจากการเรียก method
-ช่วยสร้าง syntax/pattern ที่ง่ายขึ้น
-มีประมาณ 20 operations

Collection operations: stream and pipeline

-stream ของ collection objects
-การดำเนินงานจะถูกผูกมัดกันในรูปแบบ Pipeline
-Pipeline: source stream, intermediate operations, terminal operation

To list history book titles:
books.stream().filter(b->b.category == ‘history’)
              .map(b->b.title)
              .toList()

Collection operations: examples

customers.stream().filter(c->c.country=='USA’)
                  .flatMap(c->c.orders.stream())
                  .toList()

[1,3,5,2].stream().sorted().toList() people.stream().sorted((p,q)->p.name.compareTo(q.name))                .toList()
[1,2,3,4].stream().reduce(0, (a,i)->a+i)) [1,2,3,4].stream().sum()

Summary

-EL 3 นำการเปลี่ยนแปลงที่สำคัญ
-นำทรัพยากรจาก Java EE 7 และมุมมองของระบบนิเวศของทรัพยากรมาพัฒนา

Resources
-EL project page
https://java.net/projects/el-spec/
-Glassfish 4
https://glassfish.java.net/

Reference : เอกสาร What’s New with Expression Language in Java EE 7 โดย Reza Rahman (Java EE/GlassFish Evangelist) จาก Oracle ในงาน JavaOne
top.sk Web Developer

I can design web applications by using Java Server Faces (JSF), Primefaces, EJB3, SQL, DB2 (IBM) and designing report (Word, Excel and PDF) by using XML Script and Crystal Clear Report for the organization that can be easily and no problem for used and they can use the Web to manage the customer's organization effectively. I want to learn a new culture, technology and colleagues involved in the IT profession.